WordPress database error: [Table './quadium_wrdp27/wp_postmeta' is marked as crashed and should be repaired]
INSERT INTO wp_postmeta (post_id,meta_key,meta_value)VALUES (1,'enddate','')

WordPress database error: [Table './quadium_wrdp27/wp_postmeta' is marked as crashed and should be repaired]
INSERT INTO wp_postmeta (post_id,meta_key,meta_value)VALUES (1,'shortname','')

WordPress database error: [Got error 28 from storage engine]
SHOW FULL COLUMNS FROM `wp_options`

WordPress database error: [Got error 28 from storage engine]
SELECT t.*, tt.*, tr.object_id FROM wp_terms AS t INNER JOIN wp_term_taxonomy AS tt ON tt.term_id = t.term_id INNER JOIN wp_term_relationships AS tr ON tr.term_taxonomy_id = tt.term_taxonomy_id WHERE tt.taxonomy IN ('category', 'post_tag', 'post_format') AND tr.object_id IN (1510, 8237, 8333, 8445, 8667, 8700, 9037, 9085, 9528, 9608, 10333, 10500) ORDER BY t.name ASC

WordPress database error: [Table './quadium_wrdp27/wp_postmeta' is marked as crashed and should be repaired]
SELECT post_id, meta_key, meta_value FROM wp_postmeta WHERE post_id IN (1510,8237,8333,8445,8667,8700,9037,9085,9528,9608,10333,10500) ORDER BY meta_id ASC

Recipes – Frugal Novice
Browsing Category

Recipes

Olives from Spain – Great Addition to Your Menu

WordPress database error: [Table './quadium_wrdp27/wp_postmeta' is marked as crashed and should be repaired]
SELECT post_id, meta_key, meta_value FROM wp_postmeta WHERE post_id IN (10504,10503,10502,10501) ORDER BY meta_id ASC

Note: I received samples and promotional materials to facilitate this post. I was not compensated monetarily for this post.

Olives color

Olives have always been a mainstay at Thanksgiving and other “big” meals for my family as I grew up, and now Brian, C & E love olives too so they’ll always be included in our holiday traditions.

I’ve never really thought about where these olives come from before, but now I know that many olives come from Spain. Spanish olives are a flavorful, versatile, novel, sophisticated and nutritious. There is a longstanding history and tradition of olive production in Spain, which is now being combined with the most advanced technology available. This guarantees the highest possible levels of food safety and quality. Furthermore, Spain is a world leader in the production and exportation of table olives, which demonstrates its expertise and ongoing adaptation to the tastes and needs of consumers worldwide.

Olives-From-Spain-Cans

We received some manzanilla olives, and of course we could just serve them as is:

Olives-From-Spain-Dish

But instead I decided to do something a little different and create a fun appetizer (easy, too!) – fried olives.

Yep, you heard that right. Fried.

This is a great way to still let the flavor of the olives shine through while giving an added crunch.

Simply dip olives in a mixture of 1 egg and 1 tablespoon of milk, then toss them in bread crumbs with salt, pepper, and thyme. Fry in a thin layer of olive oil over medium heat, turning the olives to get them golden brown on all sides. So easy!

Olives-From-Spain-Breaded-SideView

Three Adorable and Easy Holiday Dessert Recipes

WordPress database error: [Table './quadium_wrdp27/wp_postmeta' is marked as crashed and should be repaired]
SELECT post_id, meta_key, meta_value FROM wp_postmeta WHERE post_id IN (10337,10338,10335,10336) ORDER BY meta_id ASC

Thanks to Woman’s Day for sending me these three great – and easy – recipes to share with my readers! You can find more great festive sweets on their website.

Oreo Penguins

WDY120114_080

Ingredients:

  • 12 Oreos
  • 12 Mini Oreos
  • 1 cup shredded coconut
  • 18 banana Runts
  • Royal Icing

Instructions:

  1. Separate 12 standard Oreos.
  2. Press ½ tsp shredded coconut onto each cream piece (discard plain pieces).
  3. Separate 12 mini Oreos; scrape off and discard the cream.
  4. Cut 12 of the mini pieces in half.
  5. Using royal icing (see below), stick candy eyes and the cut side of half a banana Runt on one mini piece (for the face).
  6. Attach 2 half pieces of the mini Oreos to the body (for the wings).
  7. Stick the cut sides of 2 banana Runt halves into the cream for the feet.
  8. Repeat to create 12 penguins.

Royal Icing

Ingredients:

  • 3 large egg whites
  • 1/2 teaspoon cream of tartar
  • 1 pound confectioners’ (powdered) sugar

Instructions:

  1. Using an electric mixer, beat 3 large egg whites and ½ tsp cream of tartar on medium-high speed until foamy, about 1 minute.
  2. Reduce the speed to low and gradually add 1 lb confectioners’ sugar, beating until just incorporated.
  3. Increase the speed to high and beat until medium-stiff glossy peaks form, 5 to 7 minutes.

———————————————————————————————————————–

Snowman Cupcakes

WDY120114_134

Ingredients:

  • Gingerbread cupcakes (see recipe below)
  • Vanilla buttercream (see recipe below)
  • Shredded coconut
  • Mini chocolate chips
  • Orange Tic Tacs
  • Sour Candy Strips
  • Chocolate Jelly Rings or gummy Lifesavers

Instructions:

  1. Make 1 batch basic gingerbread cupcakes (see below) as directed.
  2. Line 8 holes of the muffin pan with red paper liners and lightly coat the remaining holes with cooking spray.
  3. Make 1 batch vanilla buttercream (see below) as directed.
  4. When the baked cupcakes have cooled completely, in a food processor, pulse the 4 unwrapped cupcakes into fine crumbs.
  5. In a bowl, mix together the crumbs and 6 Tbsp buttercream, then roll into 8 balls (1. in. each; about 1. Tbsp).
  6. Frost the remaining cupcakes with buttercream (about 2 Tbsp each) and coat with finely shredded coconut (about 1 tsp each).
  7. Use toothpicks to secure the cake balls to the cupcakes, then frost each ball with ½ Tbsp buttercream and coat with finely shredded coconut (about 1 tsp each).
  8. Decorate using mini chocolate chips for eyes and buttons, orange Tic Tacs for noses, sour candy strips for scarves and melted chocolate or more mini chocolate chips for the mouth.
  9. Make hats using chocolate jelly rings, buttercream and mini chocolate chips, or gummy Lifesavers.

Gingerbread Cupcake:

Ingredients:

  • 1 1/2 cups all-purpose flour
  • 1 1/2 teaspoons ground ginger
  • 1 teaspoon ground cinnamon
  • 1 teaspoon baking powder
  • 1/4 teaspoon ground nutmeg
  • 1/4 teaspoon kosher salt
  • 1/2 cup vegetable oil
  • 1/2 cup packed dark brown sugar
  • 2 large eggs
  • 1/4 cup unsulphured molasses (not blackstrap)
  • 1/4 cup water
  • 1/2 teaspoon vanilla extract

Instructions:

  1. Heat oven to 350°F.
  2. Line a 12-cup muffin pan with paper liners.
  3. In a medium bowl, whisk together 1½ cups all-purpose flour, 1½ tsp ground ginger, 1 tsp ground cinnamon, 1 tsp baking powder, ¼ tsp ground nutmeg and ¼ tsp kosher salt.
  4. In a large bowl, whisk together the ½ cup vegetable oil, ½ cup firmly packed dark brown sugar, 2 large eggs, ¼ cup unsulphured molasses (not blackstrap), ¼ cup water and ½ tsp pure vanilla extract.
  5. Add the flour mixture to the oil mixture and mix until fully incorporated (the batter will be thin).
  6. Divide the batter among the lined muffin cups (about 3 Tbsp each) and bake until a wooden pick inserted in the center comes out clean, 20 to 22 minutes.
  7. Let cool in the pan for 10 minutes, then transfer to a wire rack to cool completely.

Vanilla Buttercream:

Ingredients:

  • 1 lb. confectioners’ (powdered) sugar
  • 1 cup (2 sticks) unsalted butter at room temperature
  • 2 tablespoons heavy cream
  • 2 teaspoons vanilla extract

Instructions:

  1. Sift 1 lb confectioners’ sugar into a large bowl.
  2. Using an electric mixer, beat 1 cup (2 sticks) unsalted butter, at room temperature, on medium speed until creamy, about 2 minutes.
  3. Reduce the mixer to low and gradually add the sugar, alternating with the 2 Tbsp heavy cream.
  4. Mix in 2 tsp pure vanilla extract.
  5. Increase the speed to high and beat until fluffy, about 2 minutes.

———————————————————————————————————————–

Santa & Elf Cookies

WDY120114_133_133

Ingredients:

  • Nutter Butter sandwich cookies
  • Royal icing (see recipe below)
  • Gel food coloring
  • Shredded coconut
  • Sliced almonds
  • Candy eyes

Instructions:

  1. Make 1 batch royal icing (see recipe below) as directed and tint using gel food color as desired.
  2. Transfer 1/3 of each color to a separate pastry bag fitted with a fine tip.
  3. Use a few drops of water to thing the icing remaining in the bowls; place in separate pastry bags fitted with small round tips.
  4. Using the thicker icing, outline the hats, clothes, beards and faces of the elves on 24 Nutter Butter cookies.
  5. Fill the hats and clothes using the thinner icing.
  6. Let dry between colors.
  7. Use finely shredded coconut for Santa’s beard (while icing is wet) and use icing to attach sliced almonds for the elves’ ears. Buy candy eyes to attach with royal icing.

Royal Icing

Ingredients:

  • 3 large egg whites
  • 1/2 teaspoon cream of tartar
  • 1 pound confectioners’ (powdered) sugar

Instructions:

  1. Using an electric mixer, beat 3 large egg whites and ½ tsp cream of tartar on medium-high speed until foamy, about 1 minute.
  2. Reduce the speed to low and gradually add 1 lb confectioners’ sugar, beating until just incorporated.
  3. Increase the speed to high and beat until medium-stiff glossy peaks form, 5 to 7 minutes.

Don’t forget, you can find more great holiday dessert recipes on the Woman’s Day site! 

WDY120114_079_079

Mini Pizza Pot Pies Recipe – A New Tra-Dish!

WordPress database error: [Table './quadium_wrdp27/wp_postmeta' is marked as crashed and should be repaired]
SELECT post_id, meta_key, meta_value FROM wp_postmeta WHERE post_id IN (9609,9610,9599,9601,9602,9603,9606,9607,9604,9598) ORDER BY meta_id ASC

Note: I received a gift card to procure ingredients for my recipe. All opinions are honest and are entirely my own.
tradish_logo_300x300
We love to cook in our house, and trying different flavor combinations for pizza is something we do pretty often – we’ve found some combos we just love over the years! One thing we haven’t ever played around with – until now – is the format of the pizza. It’s always just been dough on bottom, sauce, cheese, toppings. Ragú inspired us to do something completely different, and the recipe we discovered is going to be a new staple in our recipe rotation!

UpsideDownPizza-Ragu

I was inspired by Ragú’s Upside-Down Deep Dish Pizza recipe  – you can see from the photo above that it looks pretty amazing! We decided to have our good friends come over for dinner, and since there were going to be 5 kids involved in this dinner, I thought it would be fun to make mini versions of the recipe using a muffin tin. I’ll include the ingredients and directions at the bottom of the post so you can try making this recipe, too! And don’t forget to check out Ragú’s Facebook page to find even more recipes to try

We used Ragú® Old World Style® Pasta Sauce instead of pizza sauce, and oh my word we should’ve been doing this all along for our pizzas. There is so much more flavor packed into this sauce than others we’ve used before, and I like that it sneaks servings of veggies in for the kids. Each jar  is made with 11 juicy tomatoes, making it Ragú’s richest, thickest recipe.

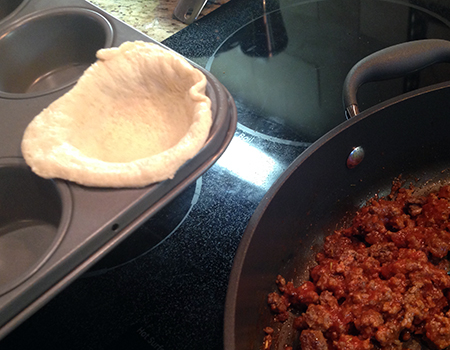
My friend Kristi used two sizes of plastic cups to cut out rounds of pizza dough – a larger round went into the bottom of the muffin tin, and we used the smaller one to top it off:

Ragu_CuttingDough

Ragu_MeatSauce_Stove

We used a variety of combinations to fill the pizzas. For some we used ground beef mixed with some of the Ragú® Old World Style® Pasta Sauce, some had spinach, some had pepperoni, and some had a mixture of the three, along with shredded mozzarella.

Ragu_Pizza_Cheese

Ragu_Pizza_IngredientsSauce

Once all the pizzas were filled, we topped off the dough and folded the edges of the top and bottom together to get a nice seal. We also snipped a small slit in the top to allow steam to escape while baking.

Ragu_Pizzas_ReadyToBake

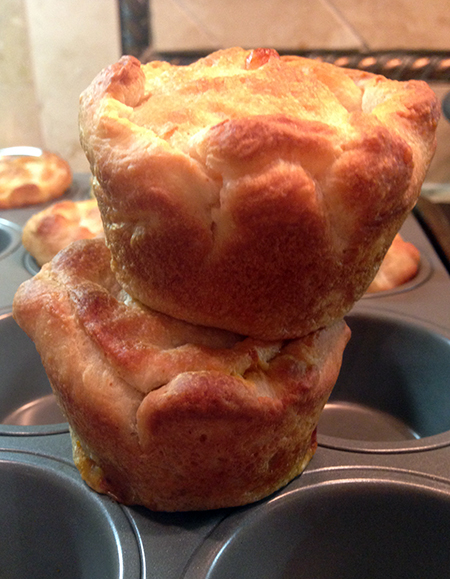
We baked these until the dough on top was golden brown, and they popped out of the muffin tin really easily. Don’t they look delicious?

Ragu_Pizzas_Stacked

And each one is filled with all sorts of flavor:

Ragu_Pizza_Inside

They were a hit with everyone!

J_Ragu_Pizza

These would be great for grab & go dinners, because it would be incredibly easy to eat these while you’re out and about. They make nice leftovers, too – just pop a couple in your lunch bag and you’re all set at work the next day!

Is your mouth watering yet? Here’s the recipe so you can go home and make these tonight:

Ingredients:

  • Ragú® Old World Style® Pasta Sauce
  • 1 lb. lean ground beef
  • 1 box frozen chopped spinach, thawed and squeezed dry
  • Mozzarella cheese
  • Pizza dough, either store-bought or homemade
  • Pepperoni
  • Any other ingredients you’d like to add! Red peppers, onions, olives, and mushrooms could all be great additions.

Directions: 

  1. Preheat your oven to 375 degrees.
  2. Cut out a round of pizza dough to press into the bottom of a well in your muffin tin – there should be a little dough overhanging the edges so you can crimp it with the top layer of dough to seal! Put dough out for as many of the pizzas as you’d like to make. This recipe is versatile so you can do as few or as many as you’d like!
  3. Fill your pizzas with whatever combinations of ingredients sound best, making sure to have some Ragú® Old World Style® Pasta Sauce either in between layers or on the top so you have flavor and so your pizza isn’t dry. Don’t pile your ingredients any higher than the top of the muffin tin.
  4. Put a smaller round of pizza dough on top of your creation, and fold the edges from the bottom layer over, pressing to seal the two rounds of dough. Using kitchen shears, snip a small slit in the top of each one to allow steam to escape.
  5. Bake your pizzas until the dough is golden brown. Enjoy!

In the mood for all things Italian after reading about this recipe? Be sure and enter the Ragú Better and Better Sweepstakes for a chance to win great Authentic Italian themed prizes, including a grand prize trip to Italy for a family of four at www.RaguSweeps.com!


Two-For-One Recipe – Pasta Sauce AND Tomato-Basil Soup

WordPress database error: [Table './quadium_wrdp27/wp_postmeta' is marked as crashed and should be repaired]
SELECT post_id, meta_key, meta_value FROM wp_postmeta WHERE post_id IN (9529,9530,9532,9533,9534,9535,9536,9531) ORDER BY meta_id ASC

We love to cook from scratch – it’s something both Brian and I enjoy doing, especially when we’re able to work together in the kitchen. Of course, with us both working full time and having three children 6 & under, that doesn’t often leave us with much time to spend on meals. We’ve got one staple, though, that we have used during many a busy week. I’ve referenced it on the blog before, but I want to show you how easy it is to make homemade pasta sauce… and how it’s even easier  to turn that sauce into a delicious tomato-basil soup for leftovers.

Ingredients:

  • 4 tablespoons butter
  • 1 1/2 cups carrot, chopped
  • 1 medium onion, diced
  • 1 28-oz. can crushed tomatoes
  • 1 28-oz. can tomato sauce
  • 1 small can tomato paste
  • Fresh basil, chopped (we use about 14 leaves, but adjust according to your taste)

Directions:

Add carrots, onion and butter to your skillet, and sauté until they’re tender (don’t rush this process or your sauce won’t end up nearly as smooth).

OnionsCarrotsRaw


OnionsCarrotsCooked


Add your tomatoes & paste, and stir everything together well. Tear basil into smaller pieces and add to the mixture.

Sauce_Basil


Use an immersion blender to puree everything together. If you don’t have an immersion blender, (carefully!!) pour the mixture into a blender or food processor to puree the mixture.

Sauce_Blending


When you’re done, your sauce will look like this:

PastaSauce


A delicious pairing for your pasta!

SauceOnPasta


But let’s say the next night you’re not really in the mood for pasta. You’ve got sauce leftover (this recipe makes quite a bit), so what do you do? With one simple ingredient, you turn the sauce into a delicious soup that works great alongside a loaf of French bread or some toasty grilled cheese sandwiches. Just put your sauce back in a pot on the stove over low heat, and add cream or half & half (add and mix a little at a time, until the soup acquires the level of creaminess you prefer). Voila! 

TomatoSoup


I also have to share this tip with you, because – as avid basil users – it has made our lives so much easier. We would often purchase basil on Sunday at our weekly trip to the grocery store, and by the time we were ready to use it later in the week it was darker and wilted, not fresh and crisp like we’d prefer. I had tried keeping it in the fridge (which I learned was a no-no) and even tried keeping it at room temperature with paper towels wrapped around it to absorb any moisture. No luck! Still, our basil wasn’t staying fresh. Then I got this tip… it’s SO easy and it kept our basil perfectly fresh until we were ready to use it on a Thursday.

StoringBasil


Take your basil out of its package and put it (stem down) into a cup with about an inch of water in it. Put a plastic bag over top of the basil, and set it in a place that won’t get too warm. SO easy, right? Now you never have to fall victim to wilted basil again!

TWO Amazing Pizza Recipes

WordPress database error: [Table './quadium_wrdp27/wp_postmeta' is marked as crashed and should be repaired]
SELECT post_id, meta_key, meta_value FROM wp_postmeta WHERE post_id IN (9473,9474) ORDER BY meta_id ASC

BBQ-Pizza

BBQ Chicken Pizza

Ingredients:

  • 2 tablespoons olive oil
  • 1/2 pound chicken tenders (or about 1 cup once cooked and diced)
  • 2/3 cup BBQ sauce (we used Jack Daniels because we already had it on hand, but any kind will do – use your favorite!)
  • 3 tablespoons all-purpose flour, for dusting
  • 1 package pizza dough (we used Pillsbury because we were in a little bit of a rush, but next time I’ll make my own dough)
  • 3/4 cup shredded Gouda cheese
  • 1 cup shredded mozzarella cheese
  • 3/4 cup shredded Parmesan cheese
  • 1/2 medium onion, thinly sliced
  • 3 tablespoons chopped fresh cilantro leaves

Directions:

  1. In a medium skillet, saute the chicken in the olive oil until browned and cooked through. Once it’s cooked, remove from heat and chop.
  2. In a bowl, mix the chicken with 2 tablespoons of BBQ sauce; set aside.
  3. On a floured cookie sheet or pizza pan, roll your pizza dough out. Use the remainder of the BBQ sauce to spread evenly across the dough.
  4. Add the Gouda, mozzarella, and Parmesan cheese; then add the chicken and onions.One note: I don’t like crunchy onions, so I sauteed some in a separate skillet to put on my half of the pizza, and then put raw onions on Brian’s half. This worked out really well for us!
  5. Bake in a 400 degree oven for 15-20 minutes or until the crust is browned and the cheese is bubbly. Mine actually took a little less time than that, I think because I used a thin crust dough.
  6. Once you’ve removed the pizza from the oven, top with chopped cilantro and slice the pizza to serve. Enjoy!


Spinach-Pizza

Spinach, Onion, and Blue Cheese Pizza

Recipe courtesy of my friend Alexis

Ingredients:

  • Pizza crust
  • 2 large or 3 medium onions, sliced into rings
  • Salt
  • Oil
  • Sugar
  • Fresh spinach
  • 4-5 cloves of chopped garlic
  • Soy sauce
  • Crumbled blue cheese

Directions:

  1. Onions:  Sprinkle with salt. Place in frying pan over medium heat in about 2 TBSP oil & cook until bottoms start to brown, then start stirring. Add about 1-2 tsp sugar. Stir and cook until caramelized. Set aside.
  2. Spinach: Remove stems. In sautee pan, heat about 2TBSP olive oil. Add 4-5 cloves choppped garlic; when garlic starts to soften, add spinach and toss. Drizzle with a little soy sauce (just a touch), let spinach soften, remove from heat, and set aside.
  3. Assembly: Make crust per package instructions (I like to roll it out on a little cornmeal). Layer with onions, spinach, and then sprinkle with crumbled blue cheese. Cook about 6-8 minutes (per package instructions) HINT: if you heat the cookie sheet or whatever you are baking the pizza on in the oven while it is preheating, it helps the crust stay crisper!

We’re always on the lookout for new pizza recipes, and sometime I want to have friends over for a pizza night. We’d make the recipes I shared with you, plus a great appetizer pizza – Spread crescent roll dough out flat on a cookie sheet and bake according to directions, then top with cream cheese and chopped raw veggies (I like broccoli and carrots, personally). Now I just need to get a dessert pizza added to my repertoire and I’ll be all set!

Quick & Delicious Chicken Parmesan

WordPress database error: [Table './quadium_wrdp27/wp_postmeta' is marked as crashed and should be repaired]
SELECT post_id, meta_key, meta_value FROM wp_postmeta WHERE post_id IN (9086,9087) ORDER BY meta_id ASC

I am a member of the Collective Bias Social Fabric Community. This shop has been compensated as part of a social shopper insights study for Collective Bias and their client.

With a family of five, we are always busy. Brian and I both work full time, too, and when we’re home in the evening with the kids we want to spend quality time with them and not be in the kitchen all night. Now that our oldest has started kindergarten and bedtime is even more important, we want to find meals that are fast to prepare but still delicious and nutritious.

When we get home in the afternoon we unload all of our things and let the kids have some downtime to play a little. This is our time to get dinner ready, and I have a perfect easy recipe to share that is great for busy weeknights.

I love this recipe because it’s SO easy to have the ingredients on hand. I like to go to Sam’s Club and stock up on things to keep in our pantry and freezer.

SamsIngredients

Here are the ingredients you need – just THREE:

And here are the directions, busy-family style:

  1. Walk in the front door. Preheat the oven and set water to boil on the stove. Pour a can of tomato sauce into another small saucepan and set that burner to low.
  2. Unpack backpacks, check folders, change into comfy clothes, let the dogs out back, or any other things you need to get done.
  3. Put the chicken on a baking sheet and stick it in the oven; put spaghetti in the boiling water. Add spices as you’d like to the tomato sauce (we use Italian Seasoning blend, garlic powder and crushed basil).
  4. Use the next ten minutes to chat with the kids and ask them how their days went.
  5. Remove the chicken from the oven and drain the pasta. Plate the dish with spaghetti, then sliced pieces of chicken, and then the seasoned tomato sauce.
  6. I keep mozzarella cheese sticks in the fridge for the kids to snack on, so I pulled some strings of cheese off and scattered them over the top of the chicken.

Delish!

SamsChickenParmesan


Cucumber “Cupcakes” with Homemade Hummus “Frosting” Recipe

WordPress database error: [Table './quadium_wrdp27/wp_postmeta' is marked as crashed and should be repaired]
SELECT post_id, meta_key, meta_value FROM wp_postmeta WHERE post_id IN (9030,9042,9028) ORDER BY meta_id ASC

CucumberCupcakesMy good friend Chemese’s birthday was last week, and she requested a little something different from your typical chocolate cake. She asked for me to make a savory snack that would fit with her Vegan lifestyle – cucumber “cupcakes” with hummus “frosting.”

For the cupcake part, I just peeled organic cucumbers and cut the ends off, then cut each cucumber into four even pieces. If I do this again, I’ll hollow out part of the cucumber with a spoon to allow more room for hummus. This worked well enough, though, and was super easy to do. When we ate these, we just cut them up into pieces.

For the hummus, I made it from scratch. It takes some time and prep, but is a fairly easy process overall. Chemese had chickpeas on hand, and she soaked them, then gave them to me. After the soaking, it’s important to boil the chickpeas until they’re tender, which took about an hour. I boiled them the night before, then stuck them in the fridge so they were cold and ready to use the next day. Of course, you could also use canned chickpeas if you don’t have the time to do the soaking and boiling.

Here are the ingredients for the hummus:

  • 4 cups chickpeas, cooked or canned, drained
  • 4 cloves of garlic
  • salt
  • tahini
  • lemon juice
  • olive oil

CucumberGraphicYou’ll notice I didn’t list amounts for the salt, tahini, olive oil, and lemon juice – that’s because I think it’s crucial that you add these a bit at a time until you get the taste and consistency you’re looking for. I believe I ended up using 4 tablespoons of tahini, the juice of 1/2 a lemon, and 2 teaspoons of salt. Here’s the process, which is pretty simple:

  1. In a food processor, put in your chickpeas and pulse to get them started blending. Add a little bit of water if you need to loosen things up a bit. Then add your garlic, and blend, adding olive oil in until you get the mixture at your desired consistency. As you can see in the photo, mine was about the consistency of buttercream frosting. 
  2. Next add in your tahini, one tablespoon at a time. It’s important to do this before adding your salt, because tahini has some saltiness to it. Blend between tablespoons, and taste after each one! Next, add your salt, again a little at a time.
  3. Last of all, add the lemon juice. You’ll be amazed at the brightness this adds to the flavor profile, but you want to make sure and not end up with something that’s just plain sour, so again – add a little at a time.
  4. Voila! You’ve got homemade hummus, which is lighter and airier than anything store-bought I’ve tried.

To finish my cupcakes, I just put the hummus in a parchment bag with an icing tip, and then topped the hummus with finely chopped carrots. I love the way they turned out! Our 4-year-old liked them so much that he asked me to make him for his next birthday. :)

Most importantly, though, Chemese liked her birthday treat, and we had a great time celebrating with her!

Chemese_CucumberCupcakes

Healthy Veggie Pizza & Delicious Stuffed Cinnamon Roll Bites – Recipes

WordPress database error: [Table './quadium_wrdp27/wp_postmeta' is marked as crashed and should be repaired]
SELECT post_id, meta_key, meta_value FROM wp_postmeta WHERE post_id IN (8711,8717,8708,8709,8706,8701,8707,8714,8710,8705,8713,8712,8702,8704) ORDER BY meta_id ASC

GreatValue_CreamCheese_Crescents Can you believe Spring is already here as of today? It seems like the first quarter of the year has flown by, but I’m ready for nice weather, playing outside with the kids, grilling, and having friends over.

We got a jump on ideas for delicious spring treats last night at my Great Value baking party – and everything we made just involved a few ingredients – so easy!

We decided to make something savory and something sweet, and the starring ingredients in both dishes were the Great Value crescent rolls and cream cheese spread. I love having dishes with overlapping ingredients, because it makes it cost even less to provide great food when you entertain – not to mention the lower Great Value prices to begin with!

So, I’m sure you’re curious about what we made, right? First let’s talk about our savory dish – cold veggie pizzas shaped to look like carrots! These are a fun way to introduce veggies into your kids’ meals, and with Easter around the corner you can remind them that bunnies love to eat carrots, so they should eat some too!

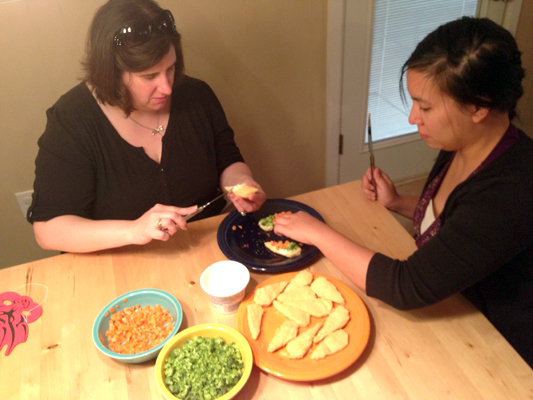
For our pizzas, first we rolled out crescent roll dough into sheets on baking pans, and baked them at 375 degrees until they were golden brown. Then my friend Amanda chopped up broccoli into fine pieces, while my friend Kristi did the same with carrots.

GreatValue_SpreadingDough   GreatValue_ChoppingBroccoli   GreatValue_ChoppingCarrots


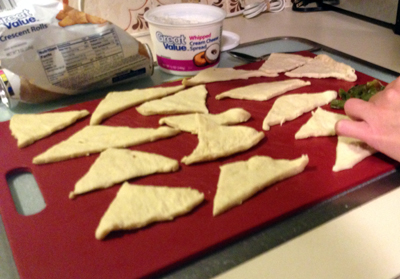
Once the dough is baked, we just cut out cone-shaped pieces. We made ours small, but you could easily make these bigger for a more substantial pizza piece. Then just spread each piece with cream cheese, and sprinkle with carrots and broccoli! The idea is to make the broccoli look like the leafy part of the carrot, but you can approach the design however you like best.

GreatValue_CarrotIngredients

GreatValue_AssemblingCarrots


GreatValue_CarrotsFinished


These are REALLY good – I’d had something similar before, so I knew I’d like these, but my friends were a little skeptical. These won them over, though, and I think they’ll be making them in the near future!  My friend Jennifer’s daughters liked them, too:

GreatValue_EatingCarrot


Now, on to the sweet treats (always my favorite part)! We made stuffed cinnamon roll bites – and let me tell you, these are AMAZING. Like, so good I can’t even convey it with words… you will just have to make them for yourself.

For this dish, all we needed was the crescent roll dough, cream cheese, cinnamon, sugar, powdered sugar, and vanilla.

GreatValue_CinnamonSugar

We mixed up a cinnamon-sugar combination to coat our crescent roll dough. We tore off small pieces to fit in a fun bunny-shaped muffin tin I bought, coated each one on both sides, and pressed it into each of the bunnies.

GreatValue_Bunny_Dough


GreatValue_DoughPressed

Then we mixed up 1/2 cup of cream cheese, 1/4 cup of powdered sugar, and 1/2 teaspoon of vanilla to use as a filling.

GreatValue_CreamCheeseScoop

For these small bites we just used a tiny spoonful, not filling the cavity up completely. Then we topped these off with another piece of cinnamon sugar-coated crescent roll dough.

GreatValue_Bunnies_NotCooked


Once these baked and cooled just a bit we popped them right out (easy with the silicone pan!) and had adorable little bunny-shaped, stuffed cinnamon roll bites. The tops of these are slightly crispy and the bottoms are gooey and amazing. We flipped ours upside down because the bottoms showed the bunny shape a little better. Aren’t they adorable?

GreatValue_BunniesFinishedLabeled

You could easily modify these with other shapes, or you can do like my friend Jennifer did and make roll-ups – she coated a full triangle of crescent roll dough with the cinnamon-sugar mixture, spread it with the sweetened cream cheese filling, and rolled it up like you would a normal crescent roll. YUM!

I hope you’ll give both of these fun spring treats a try – and don’t forget you can make other easy desserts with Great Value cookie dough – I think we’ll be making Easter cookies soon!

Note: I am participating in the Great Value program with The Motherhood. I have been compensated for my time.  All thoughts and opinions are honest and are my own.


Healthy Sandwich Recipes with Hungry Girl Flatouts

WordPress database error: [Table './quadium_wrdp27/wp_postmeta' is marked as crashed and should be repaired]
SELECT post_id, meta_key, meta_value FROM wp_postmeta WHERE post_id IN (8634,8646,8635,8633,8647,8645,8643,8644,8629,8637,8639,8638,8632,8636,8640,8641,8668,8669) ORDER BY meta_id ASC

We eat a lot of sandwiches around our house, especially now that I’m trying to make a concerted effort to eat healthier. It can be easy to fall into the rut of eating the same sandwich over and over again… but I’ve been inspired to try something new with Hungry Girl Flatouts.

One thing I love about the flatouts is that they’re available at Walgreens, so I could run in quickly and buy ingredients without having to make a long trip to the grocery store. Of course, these are popular… the first Walgreens I went to was ALL OUT!

FlatoutsGone


I wasn’t about to give up, though, so I went over to another location and found some – yay!

Walgreens

FlatoutShelf


There are several flavors available, but our store only had the rosemary & olive oil variety. I happen to love rosemary, so that was fine by me! I was looking forward to adding new flavors, and rosemary isn’t something I typically get with a standard-fare sandwich.

Flatout_Cart

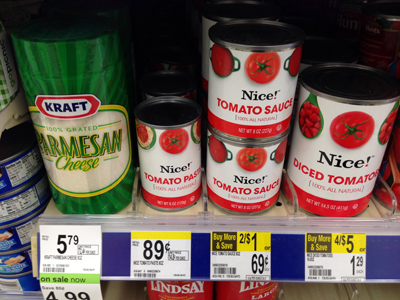
Once I had my flatouts, I went ahead and grabbed some other ingredients for my sandwiches. I had never realized before how many staple items are available at Walgreens, by the way – I was able to find quite a few things I needed!

DeliChickenStore

TomatoPaste_Store

Spices


We decided to try out a couple of different ideas for sandwiches, to add a little creativity and variety. It was a lot of fun, and I think we came up with some really tasty creations.

First, we came up with a basil chicken sandwich – SO easy and packed with flavor. The ingredients for this sandwich are:

  • Rosemary & Olive Oil Flatouts
  • Mayo
  • Basil
  • Deli Chicken
  • Tomato Paste
  • Shredded Italian blend cheese
  • Italian Seasoning

Supplies

First I made a quick basil aioli by blending olive oil mayonnaise with fresh basil:


BasilAioliBowl

I spread that on the flatouts, then topped with cheese and then the chicken:

Sandwich_goatcheese


SandwichChicken

Then, for a little extra punch, I spread a thin layer of tomato paste and sprinkled some Italian seasoning.

Sandwich_TomatoPaste


That’s it – SO easy! You could add some baby greens too, if you wanted, but I think it was really good as it was:

ColdSandwichCompleted


Then we decided to make a hot sandwich. Since we LOVE breakfast for dinner, it was only fitting that we made a breakfast sandwich. We added scrambled eggs and bacon, and for a twist we used goat cheese spread on the flatouts. Yum!

GoatCheese


Sandwich_goatcheese


SandwichesAssembled


I popped the sandwiches in the toaster oven to warm everything through, and give the flatouts a nice crunchy finish:

SandwichesCooking


FlatoutHotSandwich


We loved these! Brian said the crunchiness of the toasted flatout really added to the sandwich, and the goat cheese was a nice, unique flavor with the eggs, bacon, and rosemary from the bread.

Brian_Flatout


Note: I am participating in the Flatouts program with The Motherhood. I have been compensated for my time.  All thoughts and opinions are honest and are my own.


La Madeleine’s Tomato Basil Soup – Copycat Recipe

WordPress database error: [Table './quadium_wrdp27/wp_postmeta' is marked as crashed and should be repaired]
SELECT post_id, meta_key, meta_value FROM wp_postmeta WHERE post_id IN (8446) ORDER BY meta_id ASC

One of my very favorite soups has always been La Madeleine’s tomato basil soup. This recipe is the closest replica of the soup we’ve ever tasted – we discovered it after modifying a tomato sauce recipe a friend introduced us to. We love it, and I hope you’ll enjoy it as much as we do.

Ingredients:

  • 4 tablespoons butter 
  • 1 1/2 cups carrot, chopped
  • 1 medium onion, diced
  • 1 28-oz. can crushed tomatoes
  • 1 28-oz. can tomato sauce
  • 1 small can tomato paste
  • Fresh basil, chopped (we use about 14 leaves, but adjust according to your taste)
  • 1 small carton of cream or half-and-half
  • salt/pepper to taste

Instructions:

  1. Melt the butter in a medium saucepan.
  2. Add the carrots and onion, and saute until they are translucent (keep stirring them so they don’t get very brown).
  3. Add the tomatoes, basil, and salt/pepper and stir. Cover and simmer on low heat at least 20 minutes (but you could let this go all afternoon), stirring occasionally.
  4. VERY carefully blend the sauce with an immersion blender until smooth. I used a blender the first time but quickly discovered how much easier it was with an immersion blender – clean up was a cinch! Use whatever you have on hand, though. Either one will get you to the same end result. If you’re using a blender, you might want to let the soup cool a bit first.
  5. Enjoy! Serve with freshly-grated Parmesan and a crusty loaf of French bread. Yum!

Jalapeno Roll-Ups & Apple Pie Recipes with Great Value Crescent Roll Dough

WordPress database error: [Table './quadium_wrdp27/wp_postmeta' is marked as crashed and should be repaired]
SELECT post_id, meta_key, meta_value FROM wp_postmeta WHERE post_id IN (8339,8344,8338,8336,8352,8343,8351) ORDER BY meta_id ASC

I posted the other day about prepping for my Great Value baking party. Well, I had it last Thursday and it was SO MUCH FUN! It was originally supposed to be at my house, but when my husband came down with a nasty stomach bug my friend Jennifer graciously offered to let us have it at her house – whew, party saved!

Like I mentioned in my other post, we made an appetizer and pies. For the appetizer we used Great Value crescent roll dough & cream cheese, and then cooked, crumbled bacon and diced, roasted jalapenos.

Jennifer and I worked together on the appetizers, making quick work of them. She cut the crescent dough triangles in half, then I spread the cream cheese while she topped with the bacon and jalapenos. We made a great team!

Here’s Jennifer with the tray all ready to go in the oven:

And then check out the finished product – don’t they look delicious?

If you like bacon-wrapped jalapenos you’ll love these. I think they’d be a show-stopper at any party! With the crescent roll dough they’re not quite as spicy, so they are good for a broader audience. You could add toothpicks to these and make a really pretty and user-friendly platter! (Recipe is here)

By using Great Value crescent dough and cream cheese, it’s really affordable, too – I spent about $7 in ingredients to make these – not bad at all. And I promise, they tasted just as good as if we’d used more expensive “brand name” products (better, really, with knowing I was saving money)!

Since the appetizers were so quick we spent most of our time on the pies – well, that or holding baby E, who came along with me since Brian wasn’t really in a state to care for our 2-month-old. We decided to just make apple pies to keep things simple.

Kristi started prepping the apples – we went through 2 bags (about 16 apples) to make 8 pies. This peeler/corer/slicer made quick work of it, and it was easy enough that she could rock E with her foot while she worked (plus she’s an amazing multitasker like that)! And Amanda worked on getting the recipe multiplied out to make 8 pies.

As a reminder, we used this apple pie recipe from allrecipes.com. It’s really simple and only includes seven ingredients:

  • Great Value Pie Crust (2)
  • Unsalted Butter
  • Flour
  • Water
  • White Sugar
  • Brown Sugar
  • Granny Smith Apples

We also decided to add a little bit of nutmeg and cinnamon for some added depth of flavor – plus, I think those flavors are perfect for fall holidays, don’t you? They also helped to cut some of the sweetness – perfect!

Amanda and Jennifer worked on the filling for the pies while I held E for a little bit (For the record, I’m not a fan of this photo but it’s the only one of me so here it is!):

Kristi and I filled the pie shells with apples. We got deep dish crusts, which I’d always recommend – they leave more room for filling! :)

Amanda and Kristi cut some extra crusts into lattice pieces for the top of the pies. I told them they looked like they were having fun, and Amanda cheesed it up for the camera. :)

Once the lattices were placed across the pies, we just poured the filling over the top of everything. We just did two pies right then, since the rest of us were taking them home with us.

Pre-oven:

Post-oven:

So pretty, right? And sooo delicious! Since the rest of us were taking our pies home to bake, Jennifer put filling in containers for us and covered up the pie shells with apples. This made it easy to travel with!

So, as you can see we had a really great time – in fact, we can’t wait for our next baking party (which is coming up soon)! What baking do you have planned for Thanksgiving? Have you ever done baking parties with your friends?

Note: I am participating in the Great Value program with The Motherhood. I have been compensated for my time.  All thoughts and opinions are honest and are my own.


Pineapple Upside-Down Muffins Recipe

WordPress database error: [Table './quadium_wrdp27/wp_postmeta' is marked as crashed and should be repaired]
SELECT post_id, meta_key, meta_value FROM wp_postmeta WHERE post_id IN (8240,8241,8242,7813) ORDER BY meta_id ASC

Love pineapple as much as we do? You don’t have to wait to enjoy it just in the summer – you can enjoy it in the fall and winter, too! You could do something as simple as arrange pineapple wedges to look like a Christmas tree on a platter, but you can also find all sorts of great recipes to use pineapple in for fun holiday treats. You can even get a coupon for 50 cents off Del Monte pineapple! Just Like Del Monte on Facebook and click on the “Save” tab to get started! (Limit one per person. While supplies last.)

I’ve got a delicious recipe for some muffins that would be wonderful to take to coworkers, neighbors, or even to enjoy with your family, and I thought I’d share it with you. I found it on Del Monte’s site, fruits.com. Be sure and check out fruits.com for more great recipe ideas!

Pineapple Upside-Down Muffins

Created by EatingWell

Ingredients

Topping

  • 2 tablespoons packed light brown sugar
  • 2 tablespoons chopped walnuts or pecans (optional)
  • 1 10-ounce can pineapple slices

Muffins

  • 3/4 cup whole-wheat flour
  • 3/4 cup all-purpose flour
  • 2 teaspoons baking powder
  • 1/2 teaspoon baking soda
  • 1/4 teaspoon salt
  • 1 tablespoon ground cinnamon
  • 2 large eggs
  • 1/2 cup packed light brown sugar
  • 1/4 cup canola oil
  • 2 tablespoons pineapple juice or orange juice
  • 1 teaspoon vanilla extract
  • 1 8-ounce can crushed pineapple (not drained)
  • 1 cup grated carrot (1 large)
  • 1/2 cup old-fashioned oats
  • 3/4 cup raisins, preferably baking raisins (see Ingredient note)
  • 1/4 cup chopped walnuts or pecans (optional)

Serving Size: 12

Directions:

Glistening like sticky buns, these unusual muffins are packed with wholesome ingredients–vegetables, fruit and whole grains–so you can feel good about serving them to your family. If you prefer to make simple carrot muffins for lunchboxes or breakfasts-on-the-go, omit the topping; sprinkle 2 tablespoons chopped nuts over the muffins before baking, if desired.

  1. Preheat oven to 400°F. Coat 12 muffin cups with cooking spray.
  2. To prepare topping: Sprinkle 1/2 teaspoon brown sugar into each muffin cup. Sprinkle nuts, if using, over the sugar. Stack pineapple slices and cut into 6 wedges. Place 2 wedges in each muffin cup.
  3. To prepare muffins: Whisk whole-wheat flour, all-purpose flour, baking powder, baking soda, salt and cinnamon in a large bowl.
  4. Whisk eggs and brown sugar in a medium bowl until smooth. Whisk in oil, juice and vanilla. Stir in crushed pineapple. Make a well in the dry ingredients; add the wet ingredients and stir with a rubber spatula until just combined. Stir in carrot, oats, raisins and nuts, if using. Scoop the batter into the prepared muffin cups (they’ll be quite full).
  5. Bake the muffins until the tops are golden brown and firm to the touch, 15 to 25 minutes. Immediately loosen edges and turn muffins out onto a baking sheet. Restore any stray pineapple pieces and nuts. Let cool for at least 10 minutes. Serve upside-down, either warm or at room temperature.

Recipe Tips & Notes:

  1. Ingredient Note: Baking raisins, moister than regular ones, ensure a better texture. To substitute regular raisins, plump them first: soak in boiling water for 10 minutes; drain well.