WordPress database error: [Table './quadium_wrdp27/wp_postmeta' is marked as crashed and should be repaired]
INSERT INTO wp_postmeta (post_id,meta_key,meta_value)VALUES (1,'enddate','')

WordPress database error: [Table './quadium_wrdp27/wp_postmeta' is marked as crashed and should be repaired]
INSERT INTO wp_postmeta (post_id,meta_key,meta_value)VALUES (1,'shortname','')

WordPress database error: [Table './quadium_wrdp27/wp_postmeta' is marked as crashed and should be repaired]
SELECT post_id, meta_key, meta_value FROM wp_postmeta WHERE post_id IN (10607,10609,10612,10614,10631,10668,10673,10684,10715,10733,10735,10740) ORDER BY meta_id ASC

Frugal Novice

My Dream Puerto Rico Getaway

This is a sponsored post written by me on behalf of Puerto Rico, The All-Star Island for IZEA. All opinions are 100% mine.

Do you ever dream of traveling to an exotic place for vacation? I know I do! Summer will be here before we know it, and it’s a lot of fun thinking about where I’d like our family to go on our next trip. Puerto Rico would be an amazing choice – did you know you can travel there with no passport needed or foreign money required?

Puerto Rico is filled with world-class attractions that will turn any trip into a 5-star vacation story. Live your own 5-star vacation story in Puerto Rico. When I go on vacation I want it to feel like an escape, and want everything to be great quality. Puerto Rico delivers, and is a dream destination for getaways.

Here are just a few of the cool things that would be on my dream must-do list for a trip to Puerto Rico:

  • Puerto Rico has 270 miles of coastline and featured in the Top 10 beaches from Travel Channel — including Flamenco Beach in Culebra, often cited as one of the best beaches in the world. Our family loves to go to the beach, and I know a good part of our vacation would be spent on the Puerto Rican coastline.
  • Glow like an angel in the water in the Bioluminescent bays. The kids would absolutely love this!
  • Visit the only rainforest under US national park service, El Yunque, and climb to the clouds. Talk about a once-in-a-lifetime experience. This would definitely be an escape from dry Texas weather!
  • Enjoy old world charm of San Juan and pick up some history tidbits along the way – I think it’s great when we can inject some fun learning moments into vacations with the kids.
  • Go horse back riding (even better: horse back riding on the beach!) or trek through the magnificent Camuy caverns that runs through the 3rd largest subterranean river in the world.
  • Give in to my foodie tendencies and experience the delicacies of Puerto Rican gastronomy. I can only imagine what kinds of great foods there are to experience! Puerto Rico is also famous for their Rums, so that would be a must-try, too.

Here’s a great video to check out:

Visit See Puerto Rico and find out even more about what you could expect from a getaway to Puerto Rico, and get started planning your summer vacation! Follow @PRTourismCo on Twitter and Like SeePuertoRico.com on Facebook to stay up on all the latest.

Visit Sponsors Site

Tips for Successful Apartment Living

Back when I was in college I lived in an apartment for two years. I’ve lived in a house for over 10 years now, but I’ll never forget my apartment days! Whether it’s a luxury apartment, or a vintage walkup, apartment living has its challenges — be it noisy neighbors, sketchy landlords, or that dude who keeps hogging all the dryers. Although challenging, apartment living doesn’t have to be a nightmare. In fact, there are several ways you can actually make apartment living pretty awesome.

Get in Good with the Landlord

This doesn’t necessarily mean sucking up to the guy, but rather keeping things on good terms with him and being the kind of tenant that landlords like. Look at it this way, in order to keep renting out apartments and make his money, your landlord depends on all of the units being in good condition. He also depends on the common areas looking good so that they look attractive to potential renters. Doing your part to keep your space in good condition, and not letting your living area spill out into the hallway will go a long way toward harboring good will with your landlord. For example, if you have a dog it means cleaning up after it when you go out for walks. It also means keeping your apartment clean to avoid vermin infestations, and using air fresheners so that cooking smells and other odors don’t drift out into the hallway, and it means keeping loud noises and other unpleasant sounds within the walls of your apartment. It also means reporting to your landlord if other tenants aren’t doing their part.

Be a Good Neighbor

Living in an apartment means that you have your own space, but you also have to share space with others. A log of the things you do to stay on the landlord’s good side would also keep you on good terms with your neighbors. No one likes to be woken up at 2AM by loud parties, loud arguments, or dogs that bark all night long. It’s also difficult to live with people who mess up common areas, like leaving spilled detergent spills in the laundry room, or treating the hallway like your personal ashtray. It also means respecting any assigned spaces. For example, if your building has assigned parking, don’t park in other people’s spaces, or block them in, even if it’s closer to your apartment and you’re only going to be there a short while.

Ultimately, cultivating good relationships with your neighbors means respecting that other people have to live in the same space and treating them the way you would want them to treat you.

Protect Your Stuff

You might be surprised to discover that if your apartment is damaged by a natural disaster, a leaky pipe, or a fire, your landlord’s insurance won’t cover your personal possessions. If it’s worth having, then it’s worth protecting. Renters insurance is kind of like homeowner’s insurance for renters. It doesn’t cover the property, but it will cover your personal possessions in the event that they are damaged or stolen. It can also protect you if a visitor is injured inside your apartment, something else your landlord’s homeowner’s policy might not cover.

Some landlords actually require that all renters carry insurance as part of the terms of the lease. This is designed to protect you in the event of an incident, and to protect your landlord as well.

Make Your Space Your Own

As a renter, you are often limited in how much you can customize your apartment, and those limitations depend on your landlord. Some places might have strict rules about how you hang artwork, while others might give you a lot of latitude for making changes, as long as you get permission from the landlord first. However, temporary changes are often OK with most landlords, as long as they are easy to reverse. For example, installing a luxury shower head is easy, and only takes minutes to replace if you ever move out and you can use non-marking adhesive hooks to hang your artwork. Instead of installing shelves, you can use pieces of furniture that can also double as storage.

It may require a little creativity, but by making your place your own, you will be more comfortable and more likely to stick around.

Keep Looking Forward

Keep in mind that circumstances change. That apartment that was really awesome a year ago could be too small and cramped now. Buildings change hands, and management, which can mean rent increases and changes to the lease. No matter how awesome your space is, keep in mind that you might have to leave one day. Every now and then check apartment listings in your area, to keep abreast of what’s available and what kind of rents they’re charging, long before you ever have to start looking. Keep some money set aside so that you can easily handle the deposit plus first and last month’s rent on a new place.

When it does come time to move, make sure you have satisfied the lease and that you give your landlord plenty of notice. That, and all the work you had done previously to be a good tenant, should go a long way toward getting you a good reference for your next place.

Beautiful Bouquets at The Bouqs Company

Note: I received credit toward a bouquet to facilitate my review. All opinions are honest and are entirely my own. 

I love receiving flowers, and I love gifting them, too, so reviewing a bouquet from The Bouqs Company for my mom’s birthday was a no-brainer for me. I read up on the company before working with them and was impressed to learn they source from farms that practice responsible, sustainable farming.

I decided to go with the Hot Lava bouquet, because I loved the bright, cheery colors of the yellow and hot pink. I found that their pricing was really reasonable, so I ended up getting three dozen roses (it was my mom’s 60th birthday, after all – that’s a big deal!). I was really impressed with how well the flowers were packaged. They were secured to the box so they wouldn’t get jostled around, and this corrugated cardboard was protecting all the blooms. Each one arrived in perfect condition!

Continue Reading…

House Calls via Technology with Doctor on Demand

Note: I participated in a Blog Blast Activation on behalf of Influence Central for Doctor On Demand. I received a free trial coupon code to facilitate my review as well as a promotional item to thank me for my participation.

We have three kids, and with kids come germs. As parents, you’ll inevitably end up having to take your children to the doctor at some point. But if you’re like us, you know it’s: a) difficult to find time to sit and wait for an hour or more to see a doctor, and b) a little disconcerting to sit in a room filled with germs as you wait!

Doctor On Demand is a healthcare service that solves both of those problems: it provides 15-minute Video Visits with board certified physicians, psychologists, and lactation consultants – and you can do it all from the comfort of your own home via smartphones, tablets, and desktop computers.

All you have to do is download the Doctor On Demand app on a smartphone or tablet, or you can visit www.doctorondemand.com on your desktop computer. Just provide a list of symptoms, and you’ll instantly be connected to a provider licensed in your state for a video visit.

Guess what? Right now you can get your first visit free! Just use the coupon code NOVICE15 and you’ll be all set.


Safelite Windshield Replacement is the Ultimate Convenience

WordPress database error: [Table './quadium_wrdp27/wp_postmeta' is marked as crashed and should be repaired]
SELECT post_id, meta_key, meta_value FROM wp_postmeta WHERE post_id IN (10709) ORDER BY meta_id ASC

Note: We received a windshield replacement to facilitate our review. We were not compensated monetarily for this post. All opinions are honest and are our own. 

Our city seems to do road work on a regular basis – which I appreciate, and all, except that there’s often loose gravel on the freeway, and our minivan has been a magnet for it. Our windshield is the prime target, and we had five cracks on various places across the glass, including one spot that had spread quite a bit (confession: that crack’s been there for over a year). We’d been putting off getting the cracks fixed because we felt like we just didn’t have time to go in and get it taken care of – little did we know we could’ve used a service like Safelite to get it fixed conveniently.

Since we’d let our windshield accumulate cracks, and since one of the cracks was spreading to the edge of the windshield, it was a better idea to go ahead and get our entire windshield replaced. Travis from Safelite came right out to our office building, new windshield in tow.

Travis_Safelite_Talking

Here’s where I feel like I ought to include a public service announcement: Did you know that your windshield might be heated without you ever realizing that? It can! We had no clue ours was heated because there’s not a button to turn the feature on; it’s automatic when we turn on the front defroster. So when Safelite asked me if we had a heated windshield, I said no. Whoops!

Luckily Travis was extremely gracious about having to order a different windshield and reschedule a time for the replacement.

When he came back, he showed us the process of repairing a crack before he replaced the windshield, and it really made me wish we hadn’t put off repair for so long. It takes about 10-20 minutes for Safelite to repair cracks, and they come right to your home or place of business so it couldn’t be easier.  You can see below our crack before and the windshield afterward, along with a few steps of the process along the way:

Continue Reading…

DIY Chalkboard

WordPress database error: [Table './quadium_wrdp27/wp_postmeta' is marked as crashed and should be repaired]
SELECT post_id, meta_key, meta_value FROM wp_postmeta WHERE post_id IN (10679,10649,10648,10639,10640,10641,10642,10643,10645,10646,10644,10647) ORDER BY meta_id ASC

HowToChalkboard

If you saw my post about our DIY reclaimed wood wall then you know we’re on a sort of home decor kick. We’ve lived in our house for over a year and are finally getting around to adding personal touches to really make our house feel like a home.

At our old house we had a chalkboard border (also DIY) in the kitchen and we really loved it, so we knew we wanted to find a way to incorporate a chalkboard into this house, too. We decided the large wall in our dining room would be perfect. Once we chose the location, we got started by measuring the wall – we wanted the chalkboard to fill the wall but still have a bit of space around it. Then we went to Lowe’s and had a piece of masonite cut; we had another piece cut to make a smaller chalkboard for our friends at the same time.

To begin the project I laid the masonite out and primed it. I primed it with a magnetic primer, but I’d recommend getting a regular primer tinted black or dark grey. The magnetic primer was expensive and I was only able to get one coat on each board. I didn’t want to pay for another can, and ended up with virtually no magnetic hold to the chalkboard. Oh well – it did work well as a primer!

Masonite-Before

Masonite-Primed

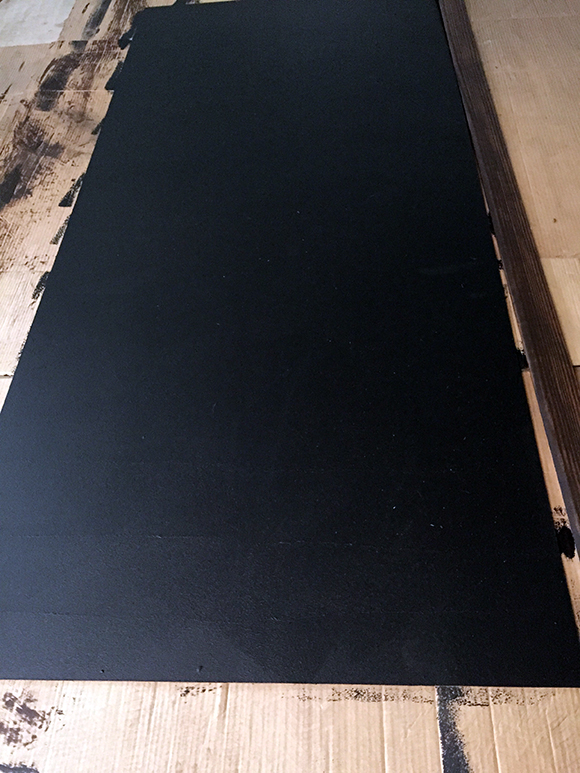
After that I put one coat of chalkboard paint on each board. I made sure to keep the coat fairly thick, and one coat did the trick.

Chalkboard-Painted

We bought some baseboard molding and I stained it to match the rest of the wood in our house. It worked out well because I love the look of a dark wood frame around a chalkboard and think it evokes a vintage feel.

We let the chalkboard paint dry for 24 hours and then it was time to prep it with chalk. It’s the one instance you want to make your brand new project look not-so-brand-new!

First I used the side of chalk pieces to cover the entire board. You don’t need to worry about making it uniform (as you can see mine is quite haphazard) – just get good coverage.

Chalkboard-Drawn-All-Over

Then wipe the whole thing down with a dry rag. Here’s what ours looked like after one pass. I ended up wiping it down one more time to get it to where I liked it.Chalkboard-Dusted

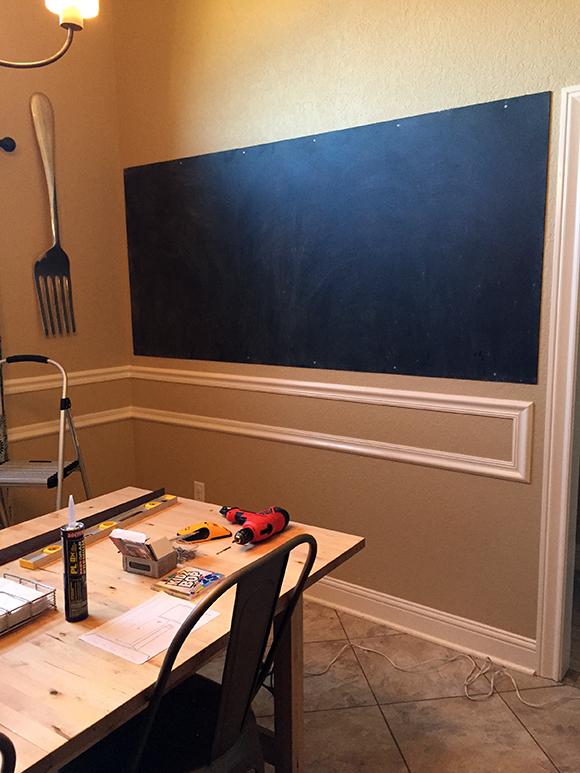
Next it was time for installation. We screwed the masonite directly into the wall at both the top and bottom of the board, hitting as many studs as we could.

Chalkboard-Hanging

Once it was up, I took a wet rag and wiped down the edges so our frame could adhere to a clean surface.

Chalkboard-No-Frame


Next we used construction adhesive to secure the frame to the chalkboard. Brian did miter cuts on the corners of our molding strips so we ended up with a nice clean finished product (FYI you don’t need anything fancy to do this; just buy an inexpensive saw and miter box, and you’re all set).

Chalkboard-Frame-Partially-Up


We used quick-grab adhesive but still decided to add finishing nails for more support. They’re small and virtually unnoticeable, but as with our wood wall I like the character they add.

Chalkboard-Finishing-Nails


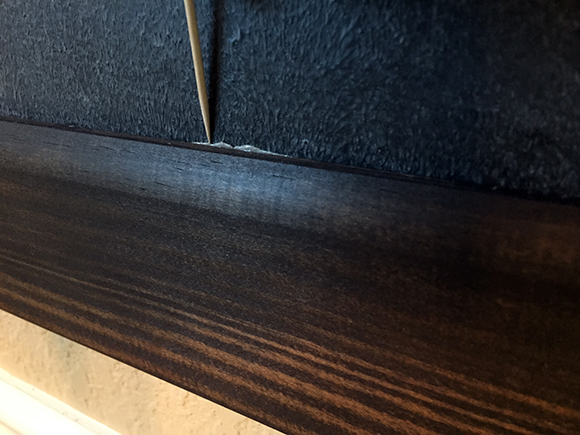
In some places the construction adhesive seeped out beyond the frame, so I used a toothpick to carefully clean up the excess:

Chalkboard-Adhesive

And voila! Our custom-made chalkboard. I love it and think it really makes the space. We’ll fill it with quotes, scriptures, birthday greetings and more.

DIY-Chalkboard-Finished

If you make your own chalkboard I’d love to see it! Send me a photo (my email address is on my contact page) and I’ll add it to this post with credit to you.

New Year’s Resolution Success with Kohl’s

WordPress database error: [Table './quadium_wrdp27/wp_postmeta' is marked as crashed and should be repaired]
SELECT post_id, meta_key, meta_value FROM wp_postmeta WHERE post_id IN (10656,10658,10663,10661,10655,10657,10659,10667,10666,10665,10660,10664,10675) ORDER BY meta_id ASC

Note: I received gift cards from Kohl’s to facilitate my post. All opinions are honest and my own.

I have a confession to make.

I’m pretty unoriginal with my New Year’s resolutions.

But, so far, I’m also pretty successful at keeping my resolution this year – so I guess in that way I’m fairly unique!

My resolution this year is to be healthier, which includes eating better and exercising more. I’ve tried this in the past and didn’t last long, but this time around I’m taking added steps to make sure I’m successful. I’ve found an app to help me track both calories consumed and burned; I’ve got an accountability partner (my husband – so convenient! And so amazingly awesome of him to agree to work out with me each night); and I’ve got the gear I need, thanks to Kohl’s.

I shop at Kohl’s pretty frequently for clothes, shoes, accessories, toys, and kitchen items. You probably do, too. But did you know Kohl’s has a pretty impressive line-up of items to help you live a healthier life?

Kohls_HealthStatement

There are a ton of options for workout gear – I personally think it’s a morale-builder to work out in something you feel attractive in; and if you feel attractive, you’re more likely to want to wear those clothes and work out in them.  Whether you’re a gym rat or you like to walk around your neighborhood, there’s attire for you.

Kohls_Womens-Workout-Clothes

Kohls-Tracksuits

Good shoes are crucial, and Kohl’s has plenty of those to pick from, too.

Kohls-NikeShoes

Don’t forget some headphones to listen to music while you work out!

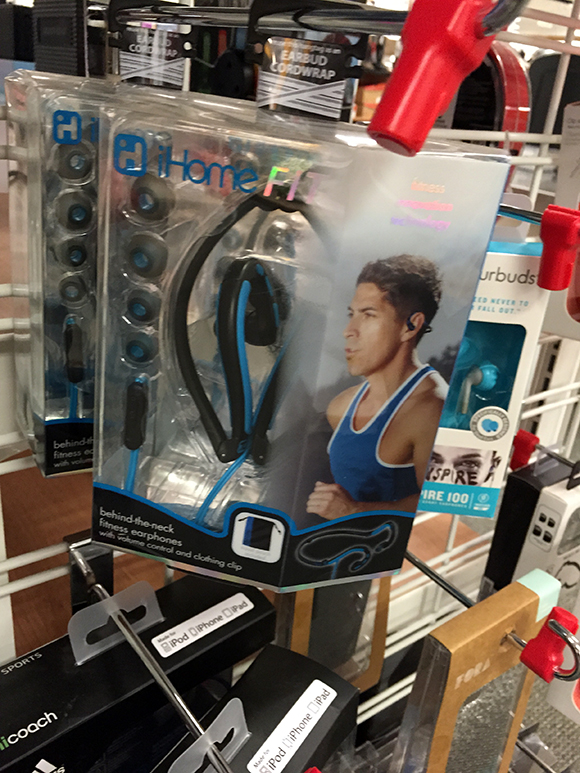
Kohls_Headphones

They even have socks that wick away sweat, and I think we can all agree that’s a very good thing.

Kohls_Socks

Beyond clothing, though, there’s all sorts of exercise equipment, from weights to kettlebells to yoga blocks and more.

Kohls-Kettlebell

Kohls-Yoga-Kit

Kohls-Yoga-Block

And since you’ll be working up a sweat, you’ll want to make sure and stay hydrated. Kohl’s has got you covered there, too:

Kohls-WaterBottles

Of course, exercising is just part of living a healthier life. It’s important to make good choices with what you eat, too. There are a ton of kitchen gadgets on the market that make it fun and easy to eat healthy, and Kohl’s offers a wide variety to choose from. There were two items in particular I looked at – the Nutribullet Pro (how easy would it be to make smoothies with this?):

Kohls-MagigBullet

and this:

Kohls-Veggetti

You can make your own “noodles” out of veggies – too  cool! This would be a really fun way to give kids veggies, by the way. Or to lower your carb intake when it’s Italian night!

I decided to get something to help keep me accountable – a Fitbit Flex.

FitBit_Kohls

It’s been really great at motivating me to want to fit in as many steps as possible – and we got one for Brian, too, so we can challenge and encourage each other to stay active! Our Kohl’s had a kiosk right by the jewelry counter with the Fitbit Flex, Charge, Charge HR and Aria scale.

If you were thinking about making a resolution to live healthier, it’s not too late to start! It’s better to start a little later than not at all. Stop by Kohl’s and have a little healthy-living shopping spree. Get yourself shoes and workout clothes; find a DVD you can do right in your living room and grab a blender for smoothies in the morning. And if you get a Fitbit let me know so we can be friends and encourage each other!

DIY Reclaimed Wood Wall

WordPress database error: [Table './quadium_wrdp27/wp_postmeta' is marked as crashed and should be repaired]
SELECT post_id, meta_key, meta_value FROM wp_postmeta WHERE post_id IN (10628,10632,10633,10635,10636,10619,10626,10622,10620,10623,10625,10617,10618,10629,10630) ORDER BY meta_id ASC

Note: We received wood from Reclaimed Lumber Products to facilitate our project. All opinions in this post are honest and are our own.

We love – love – the house we’re in now. It was a relatively new build when we bought it in 2013, and almost all of it suits our taste really well. However, if you’ve bought a newer home then you probably know all-too-well the builder beige that ends up coating every wall. Sure, it’s nice and neutral, but we wanted to inject our personality in the house to really make it our home.

The wall in the photo below leads into our master bedroom, and it’s right off the living room. It’s a wall we see often, and I wanted to do something to make it a more special entrance into our room. I’ve loved the look of reclaimed wood for years, and knew it was just what we needed for this space.

Wall-Before

I researched reclaimed wood quite a bit, and discovered Reclaimed Lumber Products as the perfect source for materials. It’s hard to find reclaimed wood locally, and even if you do the planks might be pretty thick or somewhat warped, making it difficult to adhere to a vertical surface like a wall.

Reclaimed Lumber Products is a full millwork shop and has wood planed down one side to provide a great surface for walls. The wood is primarily from barns in the Northwest; it’s not unusual for wood they use to be from barns that are 100+ years old, and I love the idea of there being history to the wood we’re using.

Once I found the source for our wood, I needed to pick which type to use. For me, it came down to two types:

ReclaimedLumberProducts-IdahoBarnWood

Idaho Barn Wood Blend. I really like the variation in types of boards, and I like that the widths vary, too – 3″, 5″, and 7″ widths are included. This photo above from their website really had me almost 100% sold, but then I also saw the Oak Blend:

ReclaimedLumberProducts_reclaimed_oak_rough_old_wall_paneling

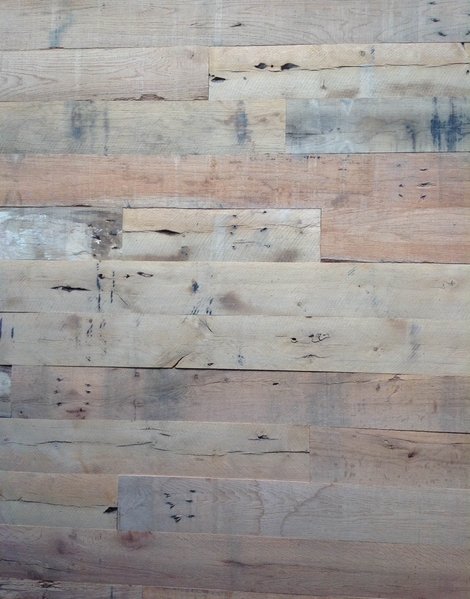
The Oak Blend was appealing to me because of the nail holes and the wear & tear you can see on the boards. Like I mentioned, I love the sense of history from reclaimed wood, and you certainly get a feel for that with the Oak Blend. The boards for this are all 5″ wide, which can make for an easier time laying out the pattern.  You get a variation of tone with these boards, too – from honey brown to grey colors with original patina and texture.

Spoiler alert: We went with the Oak Blend. And I really adore how it turned out! But first, here’s how we did this project:

First, we measured the wall. We knew that the top portion of the wall would be slightly wider because it wouldn’t have door frames on the sides. Then we worked on laying out a rough “draft” of what the wall assembly would look like. We figured out we’d need 18 rows of boards, and the top 3 would be wider (with the third row needing notches cut for the door frames).

Brian_Measuring

We figured out which rows we wanted to have a solid board running all the way across the width of the wall, and which we wanted to have multiple pieces. We also thought about coloration of the boards to have contrast, and we made sure rows with multiple boards didn’t have seams lining up with other rows. We wanted it to look fairly random and natural… but with some planning behind it.

Reclaimed-Wood-Wall-Laid-Out

Once we laid out our boards, I labeled the backs – 1, 2, 3a, 3b, etc. so that we could stack the wood up and make sure we attached it to the wall in the right order. We did our planning and installation on two separate weekends, but you could easily accomplish the whole project from start to finish in one day. When it came time for installation day, we laid out our materials and were ready to go.

Reclaimed-Wood-Boards

When it came to how to secure the wood to the wall, there were a lot of options. The Reclaimed Lumber Products site recommends attaching a plywood board to your wall, painting it flat black, and then attaching the wood to the plywood.

Since we were working around a lot of elements – a wired-in smoke detector, a light fixture, a thermostat and a light switch – we decided not to install plywood to keep the thickness down. I considered painting the wall black, but since the tones of the wood weren’t that different from the beige on our walls we just left the wall as is. Black paint is probably the safest option for a backdrop, though – any gaps between boards will just look like shadows.

We bought a construction adhesive that a friend recommended – Loctite PL Premium – and ended up needing about four tubes for our project. You’ll also need a good caulk gun to use with the adhesive tubes.

ConstructionAdhesive

This adhesive, while it works really well long-term, is somewhat slick upon initial application. We discovered the quick-grab version of this adhesive with our next DIY project, and it is much more ideal for vertical surfaces. The quick-grab version costs about twice as much as the PL Premium, so it may not be worth it to you if you’re wanting to keep your overall project costs down.

Construction-Adhesive-Wall

Reclaimed-Wood-Wall-Pressing-Board

Initially we were just going with the “hold it up until it sticks” strategy (which makes for a GREAT arm workout, by the way) and then we decided to add finishing nails to help hold the boards in place. This was the perfect solution and made the installation soooo easy. You can barely see the nails, but even if you notice them I think it adds a little to the character of the wall.

Reclaimed-Wood-Wall-Around-Thermostat

LightSwitch

Reclaimed-Wood-First-Board

Brian did cut notches to go around the smoke detector, light, light switch and thermostat. In most cases we had a seam meet up behind the device to make it easier, but for the light switch he just cut a rectangle out to allow space for the switch to fit through.

Board-Thickness

I took a photo for y’all to see just how thin the boards are against the wall. There’s some slight variation in thickness, which we loved, but the boards are all nice and lightweight, and are really easy to install.

We thought about staining the wall with stain that matches our cabinets and front door, but in the end we really like the natural finish and left the wood as is. And now here’s what you’ve been waiting for – the finished product. I can’t tell you enough how much we love this wall. It’s a real statement piece for the house now and it’s something we’ll love for years to come. And it makes it even better to have the pride of knowing that we installed it ourselves.

Reclaimed-Wood-Wall-Finished-2

Reclaimed-Wood-Wall-Finished


Favorite Car Features for Parents

WordPress database error: [Table './quadium_wrdp27/wp_postmeta' is marked as crashed and should be repaired]
SELECT post_id, meta_key, meta_value FROM wp_postmeta WHERE post_id IN (10605) ORDER BY meta_id ASC

Happy family in car

We all have “extras” we want in a vehicle, but parents come to the table with a specific needs and challenges. Vehicle manufacturers have taken note, and there are several features parents especially love to have included in their car – here’s the first:

1. Built in sunshades. No one likes using those suction-cup screens that barely cover a portion of the window. Many cars now come with shades that slide up from the base of the window and can retract when not in use. These are perfect for shielding little eyes from the bright sun.

For four other features you’ll want to keep an eye out for in your next vehicle, check out my guest post at the Kayser Chrysler Center of Watertown dealership blog.

Buying Winter Tires: What to Keep in Mind

WordPress database error: [Table './quadium_wrdp27/wp_postmeta' is marked as crashed and should be repaired]
SELECT post_id, meta_key, meta_value FROM wp_postmeta WHERE post_id IN (10601) ORDER BY meta_id ASC

WinterTires


With all sorts of winter weather potentially right around the corner at any point this season, it’s a good idea to be prepared with winter tires so you’re ready to face whatever is thrown your way on your trips to work, errands, or longer trips out of town. If you live in a region that is consistently below 45 degrees in the winter and receives considerable winter precipitation, winter tires are a must-have – and you’ll want to think about the following:

1. An easier way to make the swap. Changing out tires at the start and end of winter can totally be a pain, but here’s something to try: When you purchase your winter tires, go ahead and spend extra to get inexpensive wheels to go along with your tires. You’ll want to make sure that the wheels you purchase will hold up well to winter weather, by the way. This will make it a lot easier to swap out your tires when the time comes.

For the rest of my tips, check out my guest post at the Kayser Chrysler Center blog.

Create a Car Emergency Kit Five Items that Should be in your Car’s Emergency Kit

WordPress database error: [Table './quadium_wrdp27/wp_postmeta' is marked as crashed and should be repaired]
SELECT post_id, meta_key, meta_value FROM wp_postmeta WHERE post_id IN (10602) ORDER BY meta_id ASC

Set of basic necessities

I’m a planner, and I like to be prepared. When it comes to being on the road, particularly for long road trips, it can be crucial that you have a proper emergency kit stashed away in your trunk. It’s  easy enough to put together, and you’ll sure be glad you did – better to have one and not need it than the other way around! You can buy pre-assembled kits, but as with many things, you can save money by purchasing just what you really need. I have a list of the top five things you should make sure you include when you’re putting your kit together – here is the first:

1.     First-aid kit. This one is a no-brainer, probably. But the majority of you reading this post now probably don’t already have one in your car, do you? It’s one of those things we know we need, but we never get around to purchasing. You can find really basic kits, or you can assemble your own. Neosporin, band-aids, antiseptic wipes, gauze, adhesive tape, and aspirin are all great things to include. Your family might have specific medical needs that you want to consider, too.

For the rest of my must-haves, go read my guest post at the David Hobbs Honda Dealership blog.

Five Things to Check Out when Buying a Used Vehicle

WordPress database error: [Table './quadium_wrdp27/wp_postmeta' is marked as crashed and should be repaired]
SELECT post_id, meta_key, meta_value FROM wp_postmeta WHERE post_id IN (10603) ORDER BY meta_id ASC

Used Car For Sale

Our current vehicle was bought used, and the experience was a good reminder of what to pay attention to when shopping. We ended up being really happy with our purchase, but it’s crucial to shop smart. I’ve got five tips for things to make sure and check out when you’re buying a used vehicle, and here’s the first:

1. The aesthetics. I don’t mean what color it is, although I totally understand preferring a certain color (we had to get a black minivan so it looked a little more “sporty”). Look for dents and rust and misaligned seams to doors on the outside; notice stains or burns on the interior. Every used car will have a little wear and tear, but if damage is extensive or over-the-top aesthetically, it might be a sign that the previous owner didn’t take great care of it (how many oil changes did they actually have done, anyway?).

For the rest of my tips, check out my guest post at the Ken Garff West Valley Pre-Owned Dealership blog!